Index
IntroductionHow to construct a plan
The standard rover leave
diagram sequence
A real-world exampleDealing with deadness
The killer leave
More killer tricks
Better late than never
Copyright notice
The standard rover leave
Step by step diagrams
|
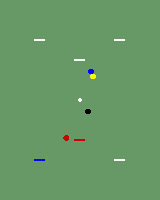
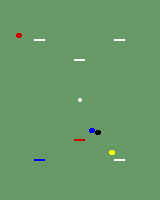
1. Blue has just run penult, and has roqueted yellow. |
|
2. Yellow is sent to #4 (black’s wicket) while blue goes to black. |
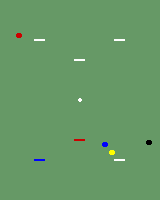
|
3. Blue has roqueted black and is about to take croquet. |
|
4. Black has been sent a few yards north and west of rover. |
|
5. Blue has roqueted red and is about to take crouqet. |
|
6. Red is sent to the side of rover while blue goes to position. |

|
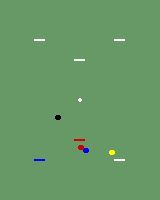
7. Blue has just run rover, and is about to roquet red. |
|
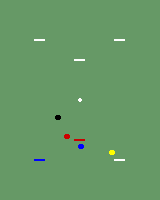
8. Blue has roqueted red and is about to take croquet. |
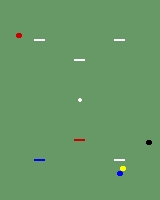
|
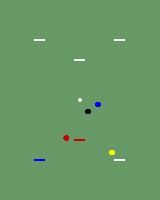
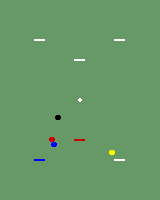
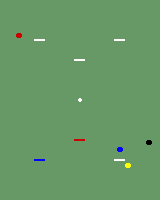
9. Blue has sent red toward corner II, and is now has a rush on black. |
|
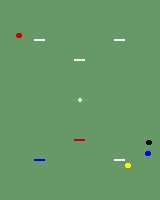
10. Blue has rushed black and is about to take croquet. |
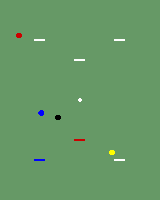
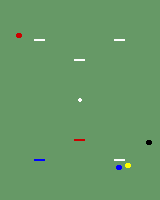
|
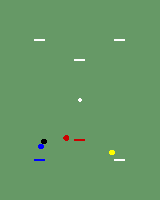
11. Blue has sent black toward the boundary, and is about to roquet yellow. First, check to see if red has an open shot on black. |
|
12. Blue has roqueted yellow, and is about to take crouqet. |
|
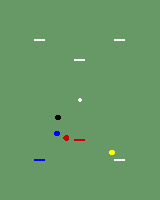
13. Yellow has been hidden from red, and blue is in position to run the wicket. |
|
14. Blue has run the wicket and is now only last-dead on yellow. |
|
15. Blue joins black. The end result: the standard rover leave |
Copyright notice
Copyright 2001–2008 by Jeff Soo.
Version 1.1
12 February 2001
12 February 2001